
Virtual Drive
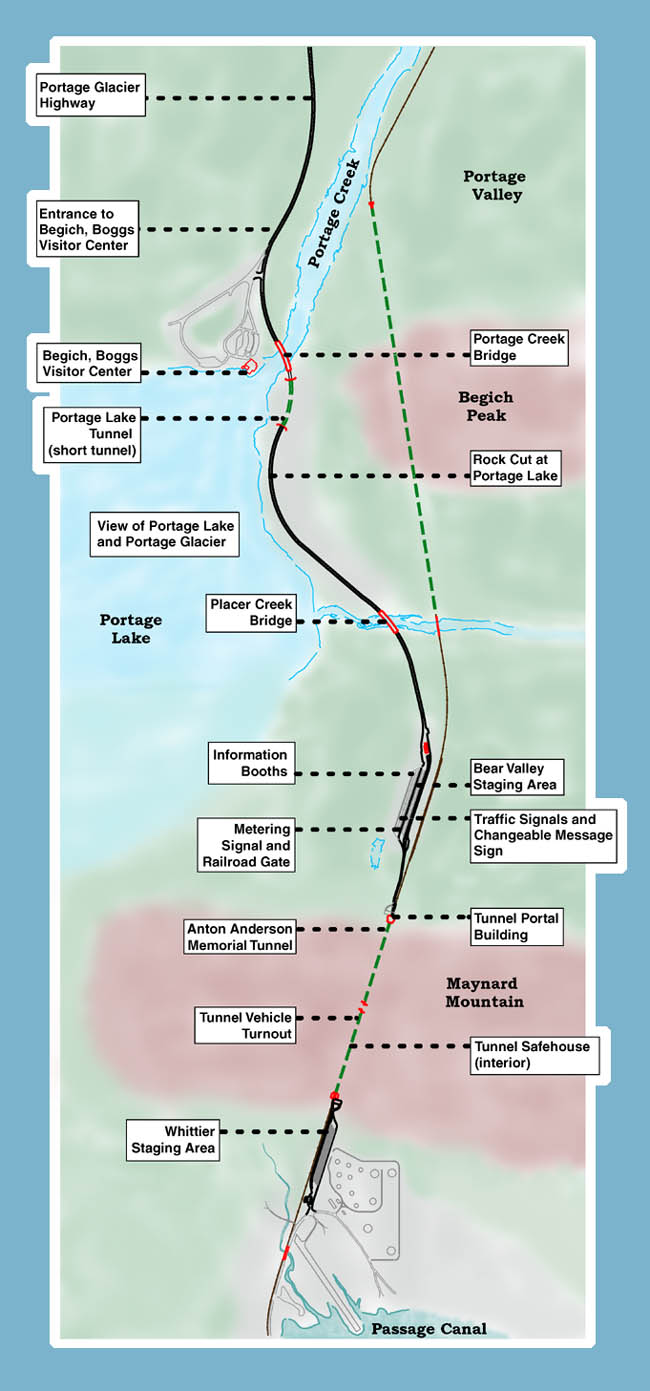
Take a virtual drive to Whittier via the Anton Anderson Memorial Tunnel. Simply click on a location on the map to scroll directly to photos and information located below.
Both automobiles and trains travel through the Anton Anderson Memorial Tunnel to Whittier. Thanks to a unique design, the tunnel allows a single lane of automobile traffic to drive directly over the railroad track area — a design that saved tens of millions of dollars over the cost of constructing a new highway tunnel. Automobiles and trains take turns using the tunnel. The Alaska Department of Transportation and Public Facilities operates the tunnel as a highway most of the day during the summer and winter.
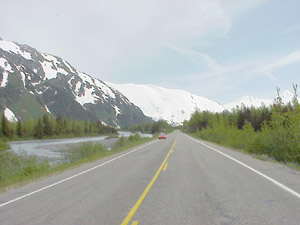
The Portage Glacier Highway
The Portage Glacier Highway intersects the Seward Highway in Portage. Before completion of the Whittier Access Project, the Portage Glacier Highway ended at the Begich, Boggs Visitor Center. The road now extends through the Anton Anderson Memorial Tunnel to Whittier. The road traverses through the Chugach National Forest.
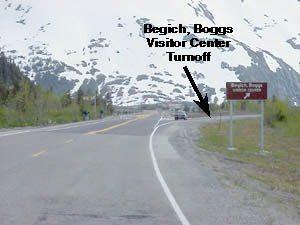
Entrance to Begich, Boggs Visitor Center
After you have traveled 5 miles from the Seward Highway, you will see the turn off to the Begich, Boggs Visitor Center on the right. This road will also take you to Portage Glacier Lodge, Portage Lake dock, and Byron Glacier. Continue ahead on Portage Glacier Highway to reach Whittier.
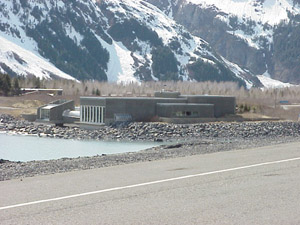
Begich, Boggs Visitor Center
The Begich, Boggs Visitor Center is one of the most visited attractions in Alaska. The center offers spectacular views of Portage Lake and the icebergs that calf from Portage Glacier at the far end of the lake. The center offers film and interactive exhibits on the Portage Glacier and the Arctic environment. The United States Forest Service (USFS) operates the center.
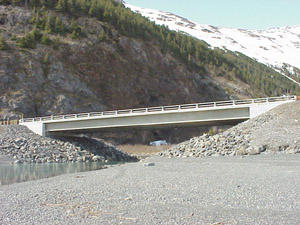
Portage Creek Bridge
(right)
The Portage Creek Bridge
is a three-span bridge designed and constructed
as part of the Whittier Access Project.
The design is unique for Alaska because the
two piers are founded on 12-foot diameter concrete
drilled shafts. The shafts are drilled over
90 feet to bedrock. The surface of the girders
and piers were sandblasted to produce a rough,
textured surface to blend into the surrounding
rock.
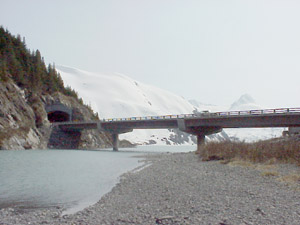
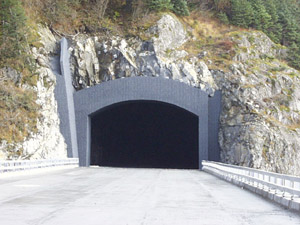
Portage Lake Tunnel
Immediately after passing over the Portage Creek Bridge, you will travel through the two-lane Portage Lake Tunnel. This short highway tunnel (400 feet) was constructed as part of the first phase of the Whittier Access Project. The tunnel accommodates two lanes of traffic and a full paved roadway shoulder. The tunnel is lighted and has a heated drainage system to minimize icicles forming during the winter months when temperatures may drop to -40 degrees F. The concrete portals were textured and colored to blend with the surrounding natural rock.
Rock Cut at Portage Lake
As you exit the tunnel you will pass alongside a series of rock slopes. The rock on the right was left untouched wherever possible to create a more natural appearance and to screen the roadway from the Begich, Boggs Visitor Center. The rock cut to your left is 160 feet high. It was blasted from inter-bedded argillite and graywacke rock formations.

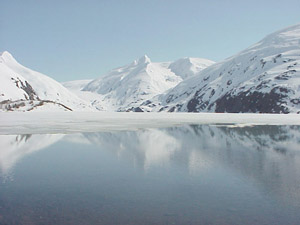
View of Portage Lake and Portage Glacier
The new highway offers fantastic views of Portage Lake and Portage Glacier. At the turn of the century Portage Glacier extended all the way to the area that is now the road. It has since retreated about 5 miles and created Portage Lake. This lake is over 650 feet deep.
Placer Creek Bridge
This bridge crosses Placer Creek, formerly one of the most abundant of Alaska's creeks for beaver and otter and frequently used by fur trappers. This area also supports a rare plant species, the Norberg arnica. The location of the bridge was changed during design to avoid impacts to this plant.
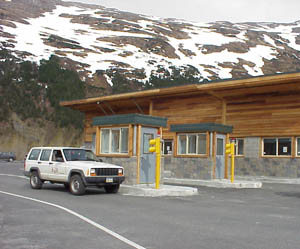
Information Booths
As you approach the staging area, you will see the Tunnel Control Center and two information booths that will be converted to tollbooths on April 1, 2001. The attendants will direct you to the proper staging lane and answer any questions. They will also provide a pamphlet that describes how to drive through the tunnel and also the procedures to follow if your vehicle or a vehicle near you stops in the tunnel. Trucks, busses, and wide vehicles will use the lane on the right. The building on the right in this photo is the Tunnel Control Center. This is where the tunnel operator monitors tunnel activities. See the Tunnel Operations page of this website.
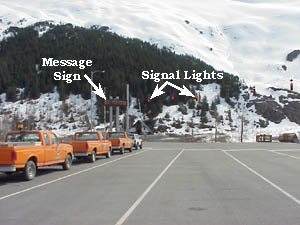
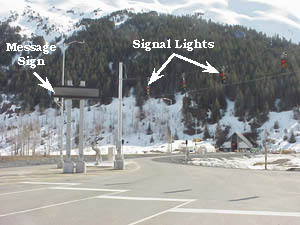
Bear Valley Staging Area
The staging area is a parking area where vehicles will "queue up" to wait for the tunnel to open. The capacity of the Bear Valley staging area is 240 cars. Certain times of the day are reserved for vehicle use and other times of the day are reserved for train use. The staging area is made up of lanes designated for cars, busses, or trucks and is similar to the staging areas used by the Alaska Marine Highway System where vehicles wait to load onto the ferry. Because this is a one-lane tunnel, highway traffic will change direction throughout the day. A word of caution: Bear Valley is notorious for its unpredictable high winds. While waiting in the staging area, you should be aware that winds well in excess of 50 mph may occur at any time.
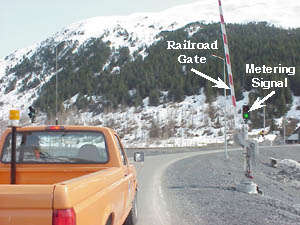
Metering Signal and Railroad Gate
At this point you will encounter
a metering signal that will control distance
between vehicles. If the light is green,
you can proceed to the tunnel. For proper
spacing, however, you may get a red signal.
This signal will require you to stop for a few
seconds before proceeding through the tunnel.
Vehicles will be allowed in the tunnel at a
rate of one car or pickup every 2.5 seconds,
one commerical truck or RV every 15 seconds,
and one bus every 45 seconds. Adjacent
to the metering signal is a railroad gate.
If the railroad gate is down, either train or
highway traffic is coming from the opposite
direction through the tunnel.
Never drive around a railroad gate that is down!
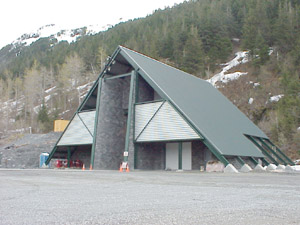
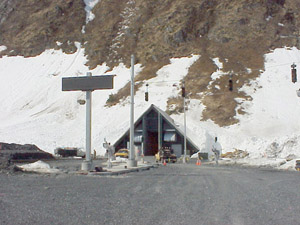
Tunnel Portal Building
The A frame portal building houses the ventilation fans, the garage for fire trucks, and the electrical sub station. It was designed to blend into the surrounding environment. The roof of the tunnel portal building at the Whittier end is made of 14 inches of concrete and was designed to withstand a major avalanche.
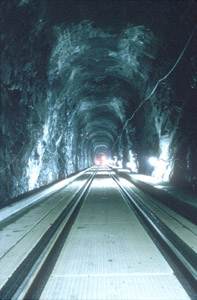
Anton Anderson Memorial Tunnel
The Anton Anderson Memorial Tunnel was originally constructed as a railroad tunnel during World War II. (See the Project History page of this website for more information.) During the winter of 1998-1999, the rail ties and ballast were removed and replaced with a concrete driving surface. The driving surface consists of 7.5-foot-long and 8-foot-wide precast concrete panels placed on a bed of crushed rock. Cast-in-place concrete was placed adjacent to the concrete panels to form an 11.5-foot-wide paved surface. Notches in the panels allow the rail to be placed flush with the surface. Asphalt was placed adjacent to the rail to provide easy access to repair the rail. Approximately 610 feet of the tunnel is lined with corrugated steel plates to control drainage and icing in the winter. Approximately 2 miles of the tunnel has chain link mesh pinned to the crown of the tunnel to catch any loose rocks. The rest of the tunnel is reinforced by concrete sprayed (shotcrete) on the crown. The majority of the rock in the tunnel is very strong and stable. During the 1964 Good Friday Earthquake (the greatest magnitude earthquake ever recorded in North America) the tunnel suffered no significant structural damage and no cave-ins.
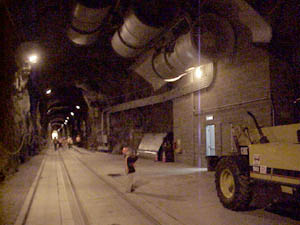
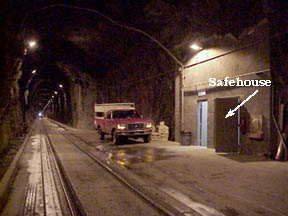
Tunnel Vehicle Turnout
At eight locations in the tunnel there is a vehicle turnout for use only if a vehicle is disabled. Vehicles in this area will set off an alarm in the Tunnel Control Center and traffic waiting to enter the tunnel will be delayed. Adjacent to this vehicle turnout is the door into the tunnel safehouse.
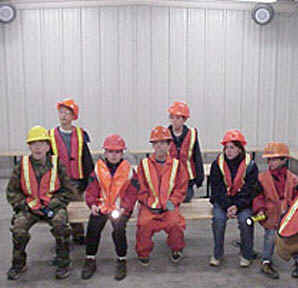
Tunnel Safehouse (interior)
At each turnout a safe refuge (safehouse) is provided in the event of a tunnel fire. Drivers and passengers would be notified by a strobe light at each turnout to evacuate their vehicles and proceed to the nearest safehouse in the event of an emergency that requires tunnel evacuation. The safehouse is a fire-resistant room with its own air supply and emergency supplies. The room has a public announcement system and a telephone to the Tunnel Control Center. The capacity of each safehouse is 55 people. Shown here is a tour group of students who visited the facility during construction.
Whittier Staging Area
After exiting the tunnel, you will bear to the left as the roadway passes the Whittier staging area. The Whittier staging area is similar to the Bear Valley staging area with the exception that there are no manned information booths. During the first weeks of operation, tunnel employees will be at the Whittier staging area to answer questions. Later, during normal operations, automated systems of signs and lights will direct traffic. The capacity of the Whittier staging area is 280 vehicles.


The Tunnel
- Whitter Access Tunnel Home
- Schedule & Hours of Operation
- Accomplishments
- Virtual Drive
- Vehicle Size, Tunnel Restrictions
- Tolls
- Project History
- Design
- Construction Photos
- Operations
- Traffic Data
- Motorcycle Safety Information
- Regulations
- FAQs
- Weather
- Current Weather
- FAA Weather Cams
Related Resources
- 511.alaska.gov -
Traveler Information - Alaska Railroad Corp.
- Alaska Marine Highway
- Chugach National Forest
- Chugach Alaska Corp.
- City of Whittier